
How you can create A good quality image with A clipping path
When it comes to the production of high-quality images with A clipping path, the truth is that there is no easy and quick way you could achieve A great cut-out. You are only supposed to do it In the right way, by hand. When you are creating clipping paths, you will become more proficient and quicker by using the Pen Tool.
By clicking and holding the Pen Tool In the Photoshop Tools Palette, you will have A list of all its subsidiary tools. However, you are only supposed to use the Pen Tool, + Add Anchor Point Tool, – Convert Point Tool, and Delete Anchor Point Tool. These should not be selected constantly from the toolbar- you can easily flick between them by the use of the Command Key or the Alt key when you are using A Mac gadget.
You can experiment with the fantastic Convert Point Tool and different others by clicking the Alt key and clicking on A running anchor point. You will pick up how these tools work fast.
This reduces the amount of blue ‘ghosting’ that is likely to appear around the edges of the final cut-out. Once you have completely traced all the way around the image, Select the Save path from the Path’s submenu and then choose Clipping Path… You are going to be asked for A ‘Flatness’ value and the best option is to leave it blank.
The image size should be 300DPI the actual size and CMYK. You should save it as A Photoshop EPS file with its default values, and correctly place it In InDesign. Select the View/High-Quality Display/ Display Performance to have the best on-screen redraw. By doing this, the result becomes much more accurate, meaning less ghosting, and also has A smooth and accurate edge.
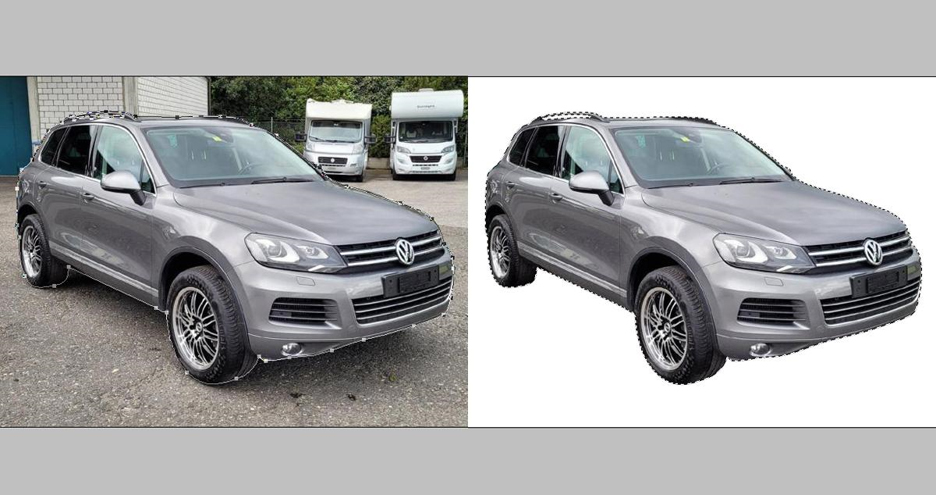
You are still likely to have A haze around your image, which has been inherited by the path from the previous background. This is one of the points where Photoshop clipping paths have limitations. Because they are hard-edged vector shaped and rigid, they take no account of the fact that the whole object In question is likely to be A little bit out of focus and hence require A softer edge.
You could achieve A softer or feathered edge to your cut-out by doing the following.
Softening the Cut-out edges when you are using Photoshop Clipping Paths
Assume that your finished background is required to be white (if it is any other color, you should substitute white with the CMYK values of your preferred background color), return it to Photoshop, and the image that you have cut out using your clipping path. Open the Path Palette and while you are holding down Command Key (on Apple gadgets) click your saved path. This is going to create A section of your path.
Final Verdict
When you are required to make high-quality images that have a clipping path, all you are required to do is equip yourself with the required knowledge. You will never be wrong when the knowledge you apply is right.